The Insurance Claims Process After Storm Damage Explained
Dealing with storm damage is never fun. One minute, your house is fine, and the next, you’re looking at missing shingles, broken windows, or a soggy basement. When the weather clears, you’re left with the mess and a lot of questions about how to get things fixed. If you’re wondering how storm damage insurance claims work, you’re not alone. The process can seem overwhelming, but it doesn’t have to be. Here’s a simple look at what happens after a storm hits and how you can make the insurance claims process a little less stressful.
Key Takeaways
- Take lots of photos and write down details about any storm damage before making repairs.
- Contact your insurance company as soon as possible to start your storm damage insurance claim.
- Read your policy so you know what’s covered and what’s not before talking to the adjuster.
- Get repair estimates from trusted contractors, but don’t rush into repairs before your claim is settled.
- Keep up with home maintenance and consider upgrades to help prevent future storm damage.
Understanding Storm Damage Insurance Claims
When a big storm hits and leaves your property looking like a mess, it's easy to feel lost about what comes next with your insurance claim. The process can seem overwhelming at first, but breaking it down makes things much more manageable. Here’s what you need to know right from the start:
Initial Steps After Discovering Damage
Start by making sure everyone is safe and the property is secure. After that, focus on protecting your home from any further harm. Cover exposed areas with tarps or plywood if you can do it safely. Don’t start major repairs yet, as your insurer will need to see the actual storm damage.
A good plan for those first few hours after discovering damage:
- Double-check for safety hazards, like downed power lines or flooding
- Prevent new problems by boarding up broken windows or placing buckets for leaks
- Secure important valuables from affected rooms
Don’t wait to address urgent issues—the sooner you take basic steps, the less likely it is that the damage will spread.
Documenting the Extent of Storm Damage
The insurance company will want proof of everything. Photos and videos are your best friends here. Walk through your home and snap pictures of all the storm damage, inside and out, including things that might seem minor, like cracked siding or water stains on the ceiling.
Bulletproof documentation should include:
- Clear, well-lit photos showing the damage from several angles
- A written list or notes of anything that looks off or broken
- Any receipts for emergency repairs or temporary fixes
Try to keep a digital backup—emailing yourself photos or saving them in the cloud is a smart move in case your phone gets lost or damaged later.
Contacting Your Insurance Provider
Once you have your evidence together, it’s time to call your insurance company. Don’t put this off—most insurers have time limits on how quickly claims need to be started. When you call, have your policy number ready and a brief description of what happened.
Expect to:
- Let them know when the storm damage occurred
- Describe the areas that were hit (roof, windows, basement, etc.)
- Ask about what documentation you’ll need and if they require a specific form or app
They’ll usually send out an insurance adjuster to look at the property, so just make sure nothing is cleaned up or tossed before they arrive—unless it’s unsafe to leave as-is.
Acting quickly with your insurance company is the best way to keep your claim on track and avoid arguments over what happened.
Navigating the Claims Process
Okay, so your home has storm damage, and you've filed a claim. Now what? This is where things can feel a bit like a maze, but don't worry, we'll break it down. It's all about understanding the steps and what to expect.
The Role of the Insurance Adjuster
Your insurance company will send out an adjuster to look at the damage. This person is basically the eyes and ears of the insurance company on the ground. They're there to assess what happened, how bad it is, and how much it's going to cost to fix. It's really important to be present when the adjuster visits, if possible. This way, you can point out all the damage you've found and ask any questions you might have. They'll take photos, make notes, and create their own report. Remember, they work for the insurance company, so while they're professionals, it's good to have your own documentation ready.
Reviewing Your Insurance Policy
Before the adjuster even shows up, or at least as soon as you can, dig out your insurance policy. Seriously, this document is your best friend right now. It spells out exactly what's covered, what's not, and what your deductible is. You'll want to pay close attention to:
- Coverage Limits: How much will the insurance company pay out for different types of damage?
- Deductible: This is the amount you have to pay out-of-pocket before the insurance kicks in.
- Specific Exclusions: Are there any specific types of storm damage that aren't covered?
- Replacement Cost vs. Actual Cash Value: This is a big one and affects how much you'll get paid.
Understanding these details beforehand can save you a lot of confusion later on.
Understanding Claim Adjustments
After the adjuster has done their assessment and reviewed your policy, they'll come up with an estimate for the repairs. This is called an "adjustment." Sometimes, their estimate might be lower than what you were expecting, or lower than what your own contractor estimates. This is where things can get a little tricky.
If you disagree with the adjuster's assessment, don't just accept it. You have the right to question it. Gather your own estimates, photos, and documentation to support your case. You might need to negotiate with the insurance company to reach a fair settlement. It's a process, and sometimes it takes a bit of back-and-forth.
It's not uncommon for there to be a difference between the insurance company's initial offer and the actual cost of repairs. Knowing your policy and having good documentation are key to making sure you get what you're entitled to.
Common Storm Damage Issues
Storms can leave all sorts of problems behind for homeowners to deal with, and honestly, it’s never just one thing. There are always a few trouble spots that show up again and again in claims. Knowing what to look for right after a storm can save time, stress, and cash down the road. Here’s a down-to-earth breakdown of the big issues that tend to pop up, plus what makes each one especially annoying to deal with.
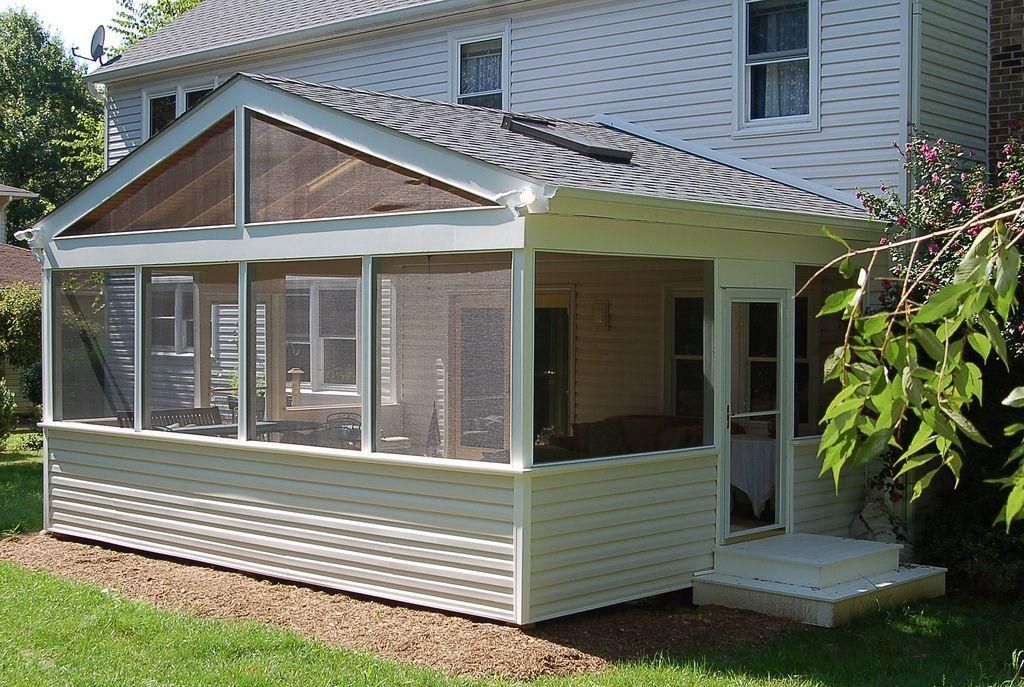
Roof and Gutter Damage Assessment
When a storm rolls through, the roof always takes the brunt of it. Shingles get blown off, torn, or just plain disappear. Gutters end up clogged with leaves and sticks, sometimes pulling away from the house entirely.
- Missing or loose shingles leave your roof open to water leaks.
- Bent or torn flashing around vents and chimneys is a typical storm problem.
- Sagging gutters or ones full of debris won’t drain rainwater right, and that messes with your siding and foundation.
If you spot shingles littering your yard or gutters dangling, don’t stand on it. These issues might look small, but ignoring them sets up even bigger headaches inside your home down the line.
Water Intrusion and Interior Damage
Honestly, water gets everywhere. Once it makes it past the roof or windows, it loves to hide out in corners you’d never expect. Moisture doesn’t care about your fresh paint job or basement carpet.
- Ceiling stains show up first, hinting at leaks above.
- Warped flooring or musty smells tell you water found its way into walls or under floors.
- Peeling wallpaper or bubbling paint are dead giveaways for hidden moisture.
If you see anything damp where it shouldn’t be, don’t just mop it up and move on. Lingering water can mean mold and even structural rot later. Sometimes there’s no visible evidence until months later—by then, repairs get way more expensive.
Siding and Exterior Component Failures
Siding does a lot more than just make the house look nice. After a storm, you might find cracked, dented, or missing pieces that expose the wood underneath. Even a little gap can let in wind-driven rain.
- Cracks, dents, or holes in siding panels (hail is usually the culprit here).
- Soffit and fascia boards may rot or break, especially around gutters.
- Detached shutters, loose trim, or busted exterior light fixtures get overlooked but still let in wind and water.
After a rough storm, take a slow lap around the house and actually look up close. Sometimes a tiny crack gets missed, and by the next storm, you’re dealing with a much bigger repair bill.
When it comes to storm damage, it’s usually a mix of all these issues coming together at once. Don’t wait—document everything, no matter how minor, and let your insurance company know early. That first walkthrough right after the storm is the best time to catch problems before they turn into giant, expensive messes.
Repairing Storm-Damaged Property
Getting your home back in shape after a major storm can be overwhelming, especially once you realize how much got damaged. Repairing storm-damaged property is a process that calls for careful planning and a bit of patience. Let's break down what you need to know and do, step by step.
Choosing Qualified Restoration Contractors
Finding the right contractor for the job is more than just picking the first name you see online. A good contractor will have experience with storm repairs and know how to handle insurance work. Here’s what to focus on:
- Verify credentials: Check for licenses, insurance, and certifications specific to storm restoration.
- Ask about previous work: Always ask for references from similar projects. If possible, look at before-and-after photos.
- Get a clear, written contract: Make sure everything is in writing—from work details to payment schedule and warranty.
Double-checking a contractor’s background and past jobs might feel tedious, but it’ll save you so much hassle in the long run if anything goes sideways.
Obtaining Repair Estimates
Before you sign anything, get a few different quotes to compare. Prices can vary widely, and so can what’s included in each estimate. Here’s how to tackle it:
- Request a detailed, itemized quote so you can see exactly what’s being repaired and what materials are included.
- Ask for a timeline with milestones so you know when certain work will be finished.
- Check if anything is NOT covered—sometimes debris cleanup or certain materials are left out.
Having multiple estimates also gives you some bargaining power and helps you spot any red flags, like prices that seem unusually low.
Managing Repair Timelines
Staying on top of repairs is tough—especially with supply chain delays or bad weather that can mess with schedules. Managing your repair timeline takes a bit of organization and good communication. Here are some things that help:
- Set expectations with your contractor about deadlines and check-in dates.
- Keep a notebook or digital log of what’s completed, ongoing, or delayed.
- If there’s a delay, ask for updates and request a revised schedule in writing.
Don’t be afraid to follow up often. It might feel awkward, but staying involved keeps your job moving and helps avoid missed steps or shoddy work.
In the end, restoring your home after a storm is a marathon, not a sprint. Choosing solid contractors, reviewing every repair estimate, and staying organized will take you a long way toward getting things back to normal—without unexpected surprises.
Receiving Your Insurance Payout
When your storm damage claim is finally approved, the next steps revolve around getting the actual money from your insurer. It’s not as quick or simple as some folks imagine, but if you know how it works, you’ll avoid some stress. Here’s what the process looks like from the moment you get the call (or email) all the way to cashing your settlement check.
Understanding Settlement Offers
The insurance company will usually send you a document called a settlement offer. This outlines what they're willing to pay for your loss and how they calculated it. Always review your settlement offer closely before agreeing—sometimes the deductions or exclusions are easy to miss at first glance.
- Read through every item and compare it to your own documentation of damage (photos, receipts, and repair estimates).
- Check to see if the settlement matches what you were told by the adjuster.
- If something looks off, don’t hesitate to push back and ask questions. You can negotiate if you think something was missed or undervalued.
Even a small error in your settlement can impact your ability to properly restore your home, so take your time and make sure nothing is overlooked before signing off.
Handling Depreciation and Actual Cash Value
Most storm policies don’t pay the full replacement price up front. They usually pay the actual cash value first, which takes depreciation into account. That just means they cut the check based on the current value of your damaged stuff, not what it costs new.
- Review how your policy treats depreciation. Some pay the rest (called "recoverable depreciation") after you've completed repairs and sent in receipts.
- Get clear on what is considered recoverable and what isn’t. Sometimes things like paint or personal belongings lose value fast.
- If your settlement seems low, check the numbers they used for age and wear—sometimes these are negotiable, too.
Finalizing the Claim and Payment
Before you get the final payout, you might need to complete a few remaining steps:
- Submit final repair bills or proof-of-completion to the insurer.
- Sign a document confirming you accept their final offer.
- Wait for your payment, which could be a check or direct deposit.
- Keep records of all the money you receive and all correspondence.
If you have a mortgage, be aware the check might come with both your name and your lender’s—meaning you’ll have to coordinate with your bank to actually use it for repairs. That process can take a bit, so don’t be afraid to ask about timelines or push for updates if things stall.
Knowing how to document everything along the way—even after repairs—can protect you if the insurer wants extra proof or if new issues come up. For more specifics on keeping detailed records, see this overview of why documentation is so important for storm claims.
At the end of the process, seeing that payment land in your account is a relief. Just remember—in the rare case you catch an error or disagree with the payout, most insurers have an appeal or dispute process. Don’t be shy about speaking up.
Preventative Measures and Future Protection
Taking action before the next storm is probably the best way to save yourself stress and money. A little effort now makes a big difference when bad weather rolls in. You don’t have to become a home repair expert overnight, but tossing a few good habits into your regular routine really pays off. Here’s what to focus on:
Proactive Home Maintenance Strategies
Stay on top of regular upkeep, and you'll dodge a ton of bigger hassles later. Sometimes, homeowners put this stuff off until something breaks, which is almost always more expensive and stressful. Instead, try to catch issues while they’re small.
- Clean your gutters at least twice a year — once in the spring and again just before fall ends.
- After heavy storms, walk around your house and look for missing shingles, loose siding, or puddles near the foundation.
- Trim tree branches away from your roof and siding so they don’t cause damage or drop debris into your gutters.
- Check for water stains or peeling paint indoors, especially around windows and corners; these can be early signs of leaks.
A short Saturday spent checking gutters and trimming trees can keep you from spending weeks dealing with water damage and contractors later on.
Upgrading for Enhanced Home Protection
If you keep fixing the same problem every year, it might be time to upgrade, not just patch things up. Modern materials and updated designs work better and last longer — and sometimes insurance companies even offer discounts if you make storm-resistant improvements.
- Replace old, leaking gutters with seamless or larger-capacity ones to handle heavy water flow.
- Think about installing impact-resistant roofing or reinforced siding, especially if you get lots of hail or wind storms.
- Add gutter guards to cut down on clogs if your property collects a lot of leaves.
- If your windows are old, look into options rated for storm resistance or install sturdy storm shutters.
These investments cost some upfront, but they cut down on repair bills and hassle every time the weather gets rough.
Understanding Local Climate Impacts
Not every house faces the same risks, even in similar neighborhoods. Figure out how your local weather patterns—and even microclimates—affect your home. What works in one part of the country might be worthless in another.
- Take stock of the typical weather threats in your area: Is flooding more common, or is wind damage a bigger worry?
- Notice if your property holds puddles after rain or if wind always hits one side hardest.
- Ask your neighbors what problems they’ve run into, and how they fixed them (sometimes, they’ve already figured out clever solutions).
The best prevention isn’t always high-tech; sometimes, simple grading of the yard or moving a downspout fixes things for good.
By making these tasks a habit, you're not just keeping your insurance premiums lower — you're protecting your comfort and sanity, too. A sturdy, well-maintained home weathers storms a lot better than one that's ignored until things go wrong.
Taking steps now can help stop small problems from turning into big and expensive ones later. Stay ahead by protecting your home and keeping it safe for the future. If you want advice or a quick check, visit our website to see how we can help you today!
Conclusion
So, that's the insurance claims process after storm damage in a nutshell. It can feel overwhelming at first, especially when you're already dealing with the mess a storm leaves behind. But if you take it step by step—document the damage, call your insurance company, keep track of all your conversations, and don't be afraid to ask questions—it gets a lot more manageable. Remember, you're not alone in this. Most people go through it at some point, and there are plenty of resources out there to help. The main thing is to stay organized and patient. Sometimes the process takes longer than you'd like, but sticking with it can really pay off in the end. And hey, once it's all sorted, you'll be glad you took the time to do it right.
Frequently Asked Questions
What should I do right after I notice storm damage to my home?
The very first thing you should do is make sure everyone in your home is safe. Then, take pictures or videos of all the damage you can see. This is super important for your insurance claim. Try to prevent any further damage if you can do it safely, like putting a tarp over a damaged roof section. Don't start major repairs until your insurance company gives you the go-ahead.
How do I properly document storm damage for my insurance claim?
Take clear photos and videos of everything that's damaged. Get close-ups and wider shots to show the full picture. Make a list of all the damaged items and areas. Note down when you first noticed the damage and any temporary fixes you made. This detailed record will be really helpful when you talk to your insurance adjuster.
What is the role of an insurance adjuster?
An insurance adjuster is a person sent by your insurance company to check out the damage. They'll look at what happened, figure out how much it will cost to fix, and help determine what your insurance policy covers. It's their job to assess the situation and give the insurance company a report so they can process your claim.
What if the insurance company's offer doesn't seem fair?
If you think the offer from your insurance company isn't enough to cover all the repairs, don't just accept it. You have the right to question it. Review your insurance policy carefully to understand what's covered. You can also get your own estimates from qualified contractors. If you still disagree, you might consider hiring a public adjuster or seeking legal advice.
How do I choose a contractor to repair storm damage?
It's really important to pick a good contractor. Look for ones who are experienced in storm damage repair and have good reviews or references. Make sure they are licensed and insured. Get written estimates from a few different contractors before deciding. Don't feel pressured to hire the first person you talk to.
What's the difference between Actual Cash Value (ACV) and Replacement Cost Value (RCV)?
Actual Cash Value (ACV) means the insurance company pays you what the damaged item was worth right before it was damaged, taking into account its age and wear. Replacement Cost Value (RCV) means they pay you enough to buy a brand-new item to replace the damaged one. Most policies start with ACV and might pay the difference for RCV once you've actually replaced the item.